On Sunday it was time to try out the red rangers we just butchered. We loved raising these. They’re much more active than regular CornishX broilers. They have way fewer heart and leg problems. And they’re smart enough to put themselves in the shed at night, rather than just plopping down beside the feeders right out in the open where the owls can easily scoop them up. So we were hoping that their taste would also fall in the ‘pro’ column. (In the ‘con’ column, they take at least 3 weeks longer to finish. We haven’t calculated feed efficiency yet.)
One difference between these and the CornishX is that the breast pieces on the red rangers are narrower and the leg/thigh pieces are bigger. Also you might see some dark spots on the skin – mainly around the edges. This is simply due to the fact that they’re a red broiler instead of white. Also, if there are any pin feathers they’re a little more noticeable. I mainly noticed just a few of these in the joints of the wing pieces. Again, not a big deal, they pull out easily. I don’t know why, but somehow this makes me feel like I’m channeling my pioneer ancestors 😉
It had been a while since I’d done a plain old roast chicken, so that’s what I googled: “perfect roast chicken”. And what came up was a roast chicken by one of my favorites, Jamie Oliver.
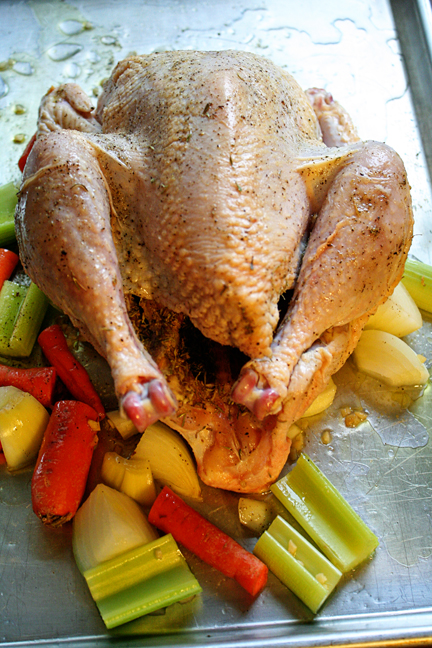
I mostly followed the recipe as written. I used just one onion instead of two, and instead of using fresh herbs I used dry herbs and rubbed them around the inside of the cavity. Use whatever you have on hand – I pulled out dried thyme, garlic powder, and celery seed. I just eyeballed amounts and mixed them together until I had 1 or 2 tablespoons total. I also added about a quarter cup of water to the roasting pan before putting it in the oven, and added another quarter cup of water halfway through the cooking time.
Here’s my chicken before it went in the oven:
It’s an hour and twenty total minutes in the oven. I set my timer for 40 minutes, then added the water and basted the chicken, and set my timer for 40 minutes again. Our chickens are always pretty lean, so there wasn’t really anything to baste with so I just basted with some more olive oil.
The vegetables you cook the chicken with are just for flavor, which is why you don’t have to peel them or anything. So if you want roasted vegetables with your chicken you can prepare those during the first half of the chicken cooking time, and then stick them in the oven with the chicken after you’ve basted it halfway through. Matt had requested mashed potatoes so I made those, and just oven roasted a package of frozen “California blend” vegetables.
When the chicken was done I realized I was out of aluminum foil, so instead I covered the chicken with 2 tea towels instead of the foil + a tea towel.
The chicken was so moist, it was super easy to carve it into the standard 8-piece cut. The skin was crispy and full of flavor. A big two thumbs up all round! Can’t wait for our customers to try these! Email sugarcreekfarm@outlook.com to order, or I’ll be at North Iowa Farmers Market in Mason City this Friday from 3-6. Email me your order before Friday and I can have your chickens ready to pick up at market!
3 years ago:
Signs